Auto upload view ids with gradle
In order to create interactions for screen over Zabaan CMS for the latest release, view IDs need to be updated from CMS everytime they change. Zabaan CMS allows us to upload view ids in bulk using R.java or a CSV file in a specified format. We provide tools tools to reduce the manual work of generating R.java and uploading it to the CMS. Follow the instructions below to learn more.
Check out this video guide to see how to upload the view IDs to CMS
Prerequisites
Before you can go ahead and upload the view ids you'll first need to make sure you have a few things ready.
- Make sure you have Android SDK installed and
ANDROID_HOMEis present in yourPATH. (You can also pass theANDROID_HOMEdirectory as an argument, more on that later.) - Make sure you have created a release APK, store the path to that APK as it'll be required later.
-
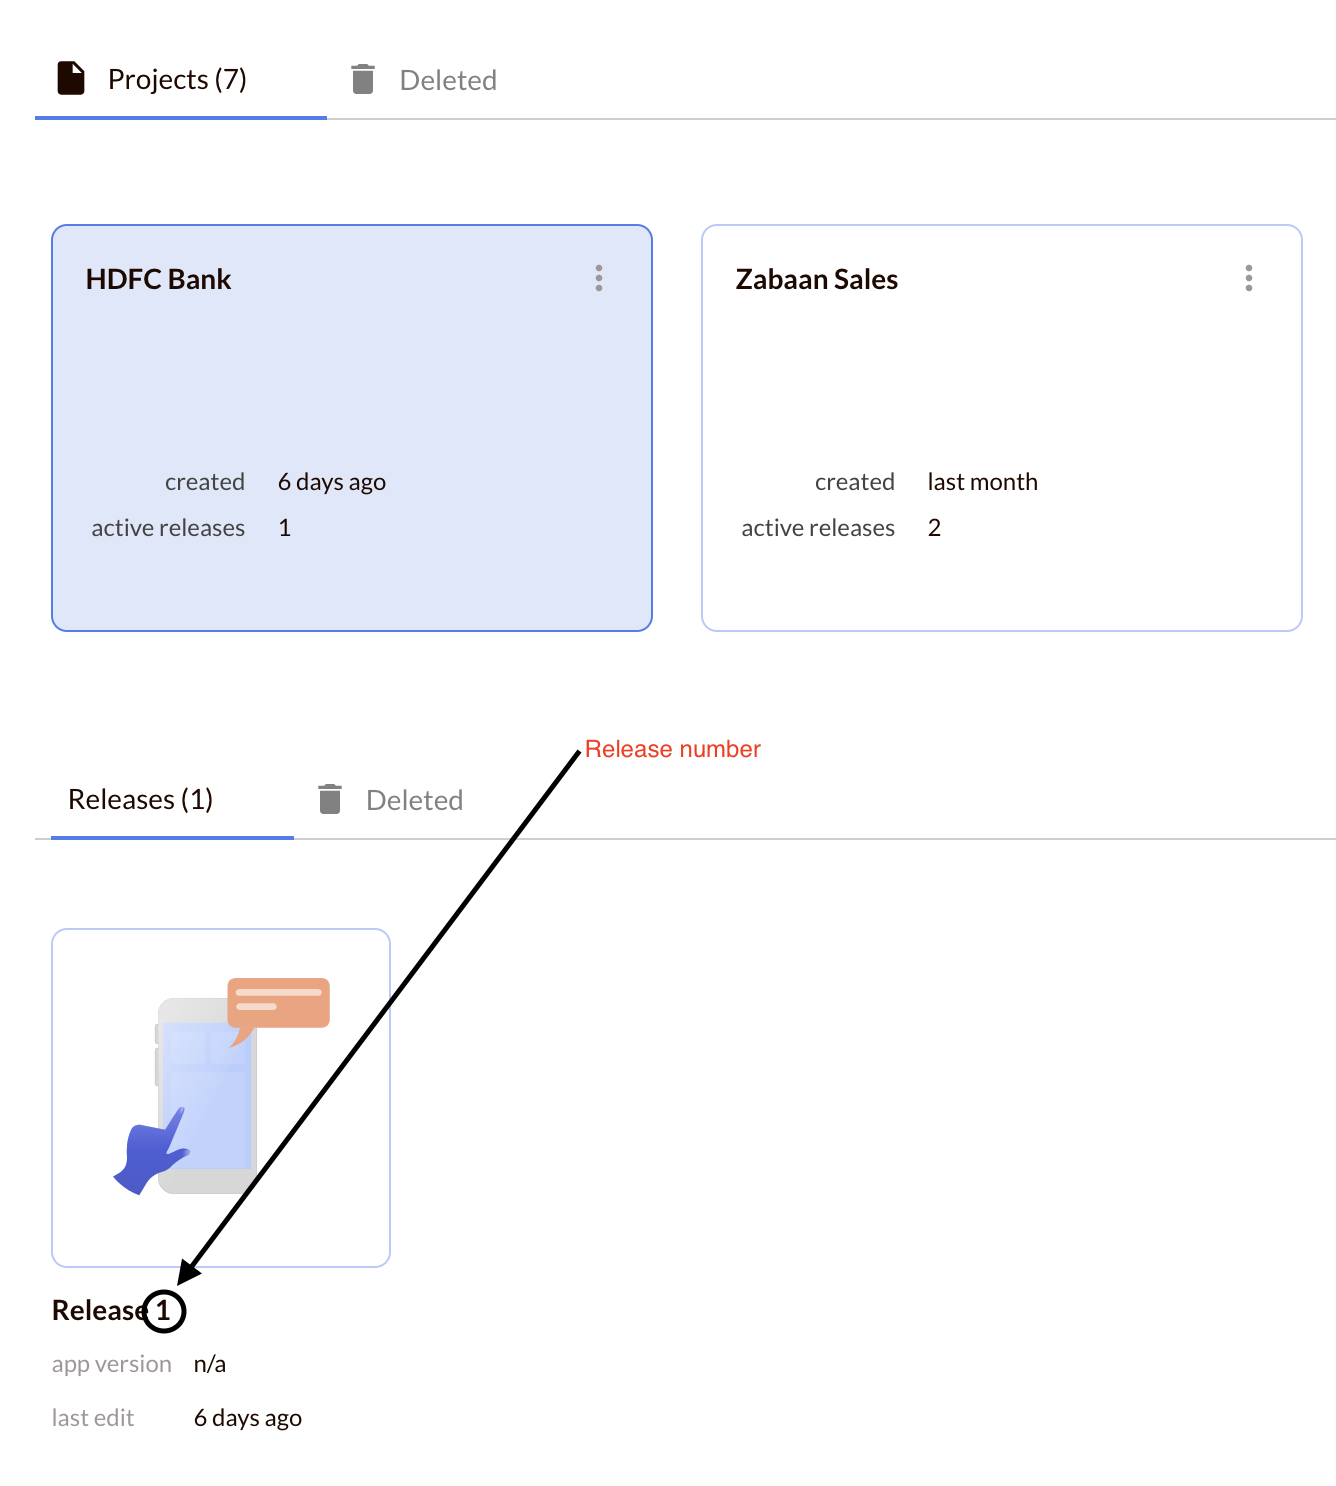
(Upload only) If you want the gradle script to upload the CSV File, you will require the release number of the release you want to update view ids for and the dev token handed to you by the Navana team. These are required so we can upload the CSV File to your release.
Make sure you do not share this token with anyone outside your organisation.
Generate CSV File
If you only want to generate CSV File and don't want to upload it to the latest release, you can do it using our zabaan.gradle script. You can find the script here:
Arguments
The following arguments must be passed from the command line.
| Name | Required | Description |
|---|---|---|
| androidHomePath | NO | Absolute path to the Android SDK. This is not required if ANDROID_HOME is available as a PATH variable. |
| apkPath | YES | Absolute path to the release APK |
Steps
- Download the
zabaan.gradlescript available above. - Place the script in your
:appsubproject -
In your
applevelbuild.gradleadd the following to the bottom of the script. (After yourdependencies {}block)apply from: 'zabaan.gradle' -
Now, create your release APK, if you haven't already, and inside your android project, run the following command. (You can skip the
—androidHomePathif you haveANDROID_HOMEin yourPATH)./gradle generateBindings --androidHomePath="/path/to/android/sdk" --apkPath="/path/to/apk" -
Yay, we're done. You should see this message:
CSV File create at /some/path. This means the task was completed successfully. If you see aBUILD FAILEDmessage, this means that something went wrong. Try to fix the error mentioned or just ask us for help!
Upload CSV File
If you want to generate CSV File and upload it to a release, you can use the zabaan-upload.gradle script. You can find the script here:
Arguments
The following arguments must be passed from the command line.
| Name | Required | Description |
|---|---|---|
| androidHomePath | NO | Absolute path to the Android SDK. This is not required if ANDROID_HOME is available as a PATH variable. |
| apkPath | YES | Absolute path to the release APK |
| releaseNumber | YES | Latest release available on the CMS. |
| token | YES | Token to upload the CSV File to the project. |
Steps
- Download the
zabaan-upload.gradlescript available above. - Place the script in your
:appsubproject -
In your
applevelbuild.gradleadd the following to the bottom of the script. (After yourdependencies {}block)apply from: 'zabaan-upload.gradle' -
Now, create your release APK, if you haven't already, and inside your android project, run the following command. (You can skip the
—androidHomePathif you haveANDROID_HOMEin yourPATH)./gradle uploadBindings --androidHomePath="/path/to/android/sdk" --apkPath="/path/to/apk" --releaseNumber=1 --token="SECRET_TOKEN" -
Yay, we're done. You'll see a message like
CSV File uploaded successfully. This means the task was completed sucessfuly. If you see aBUILD FAILEDmessage, this means that something went wrong. The error message contains bits about what might have went wrong, try the solution mentioned there or just contact us and we can fix it for you.