Publisher flow on CMS
With the introduction of Publisher SDK for Zabaan, we are able to empower Product managers to manage content for Zabaan by reducing dependency on developers.
How is the Publisher SDK useful?
Publisher SDK enables a product manager to capture metadata backed screenshots directly from the App and access it easily in the Zabaan CMS.
-
Provides Visual reference for creating annotations: These screenshots provide visual reference and thus simplifies the process of creating and managing annotations.
-
Reduced dependence on Developers: Publisher SDK removes the requirement of developers to update android view information on the CMS enabling a Product manager to navigate through the process end to end independently post setup.
How to get started
To begin, your developer needs to complete a quick integration of our SDK as mentioned here and generate an APK for you to install on your phone.
Step 1
Once you’ve installed the apk on your phone, open your app with Publisher SDK integrated in it. You will receive a notification as shown below.

Step 2
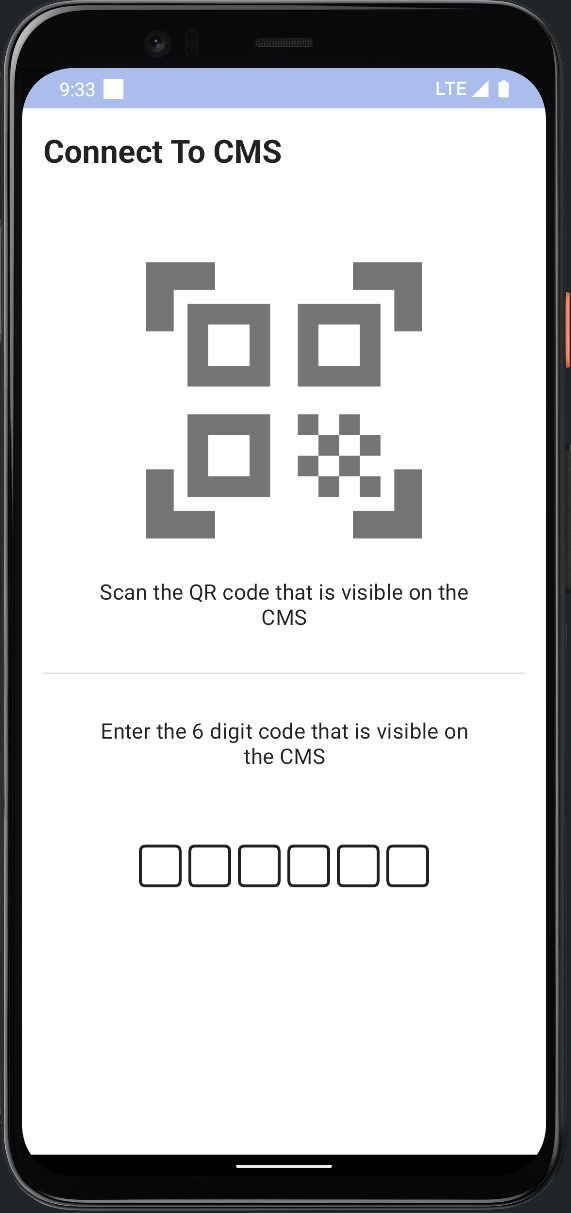
Tap on the notification. You will be navigated to a QR code scanner screen.
Step 3
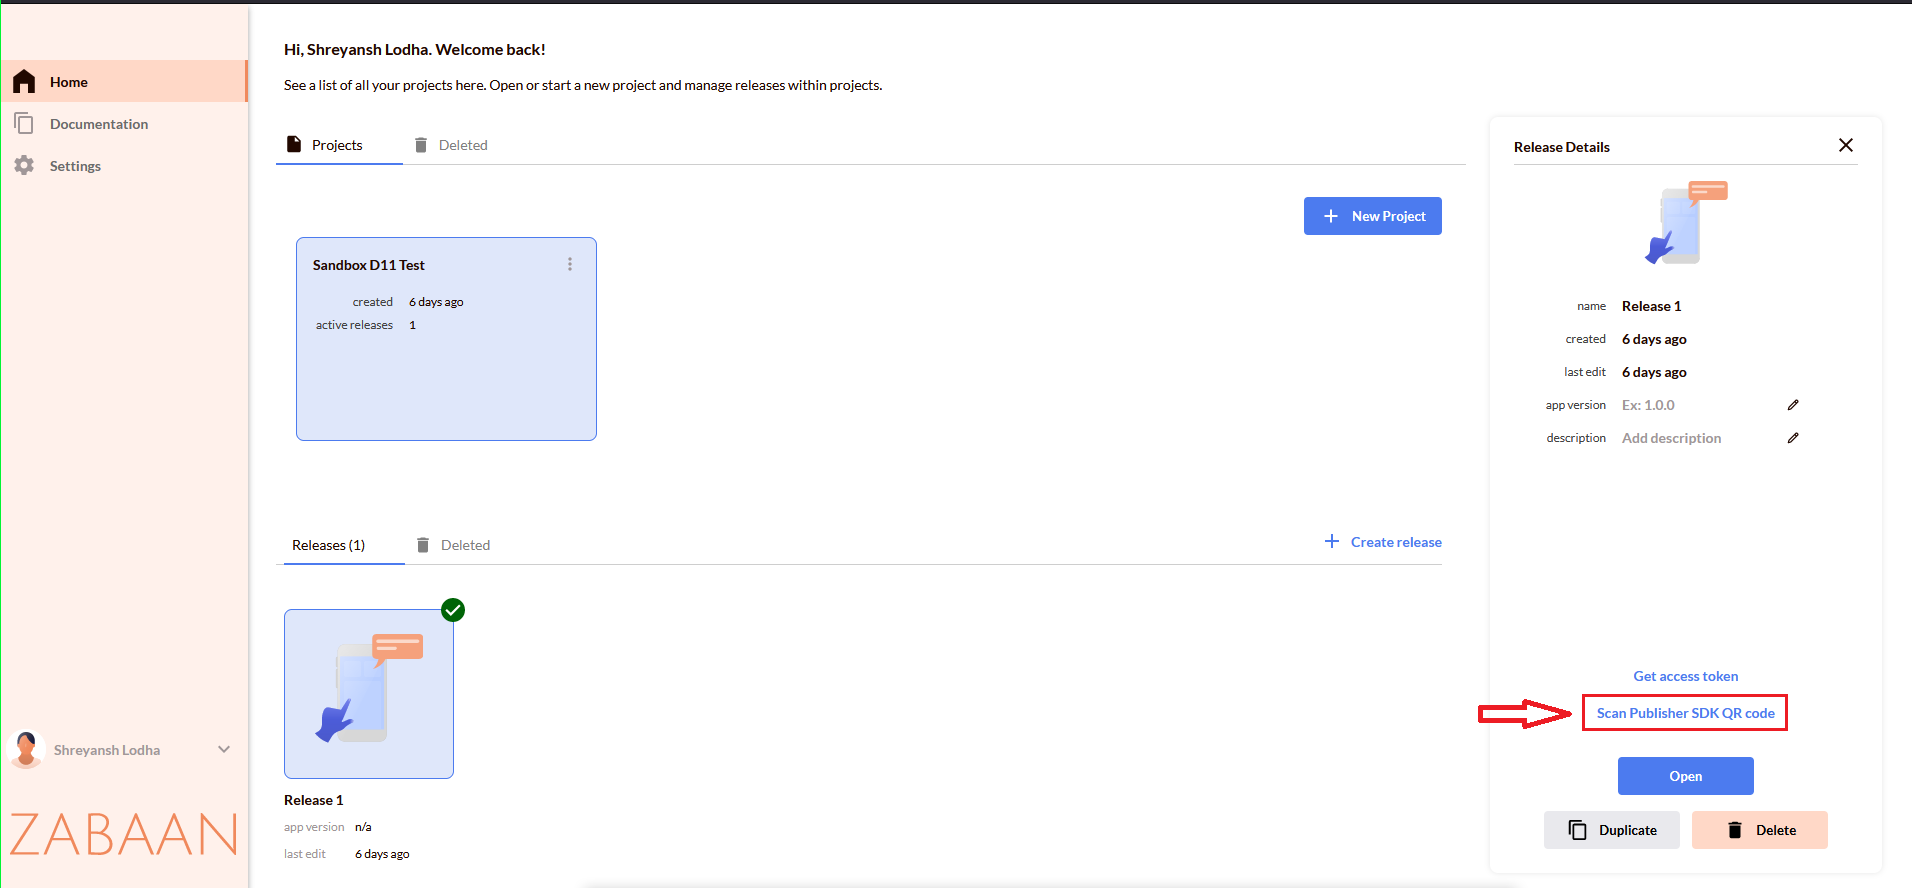
To get the QR Code, open your project release on the CMS. Click on “Scan Publisher SDK QR Code” in the release details pop up.
Step 4
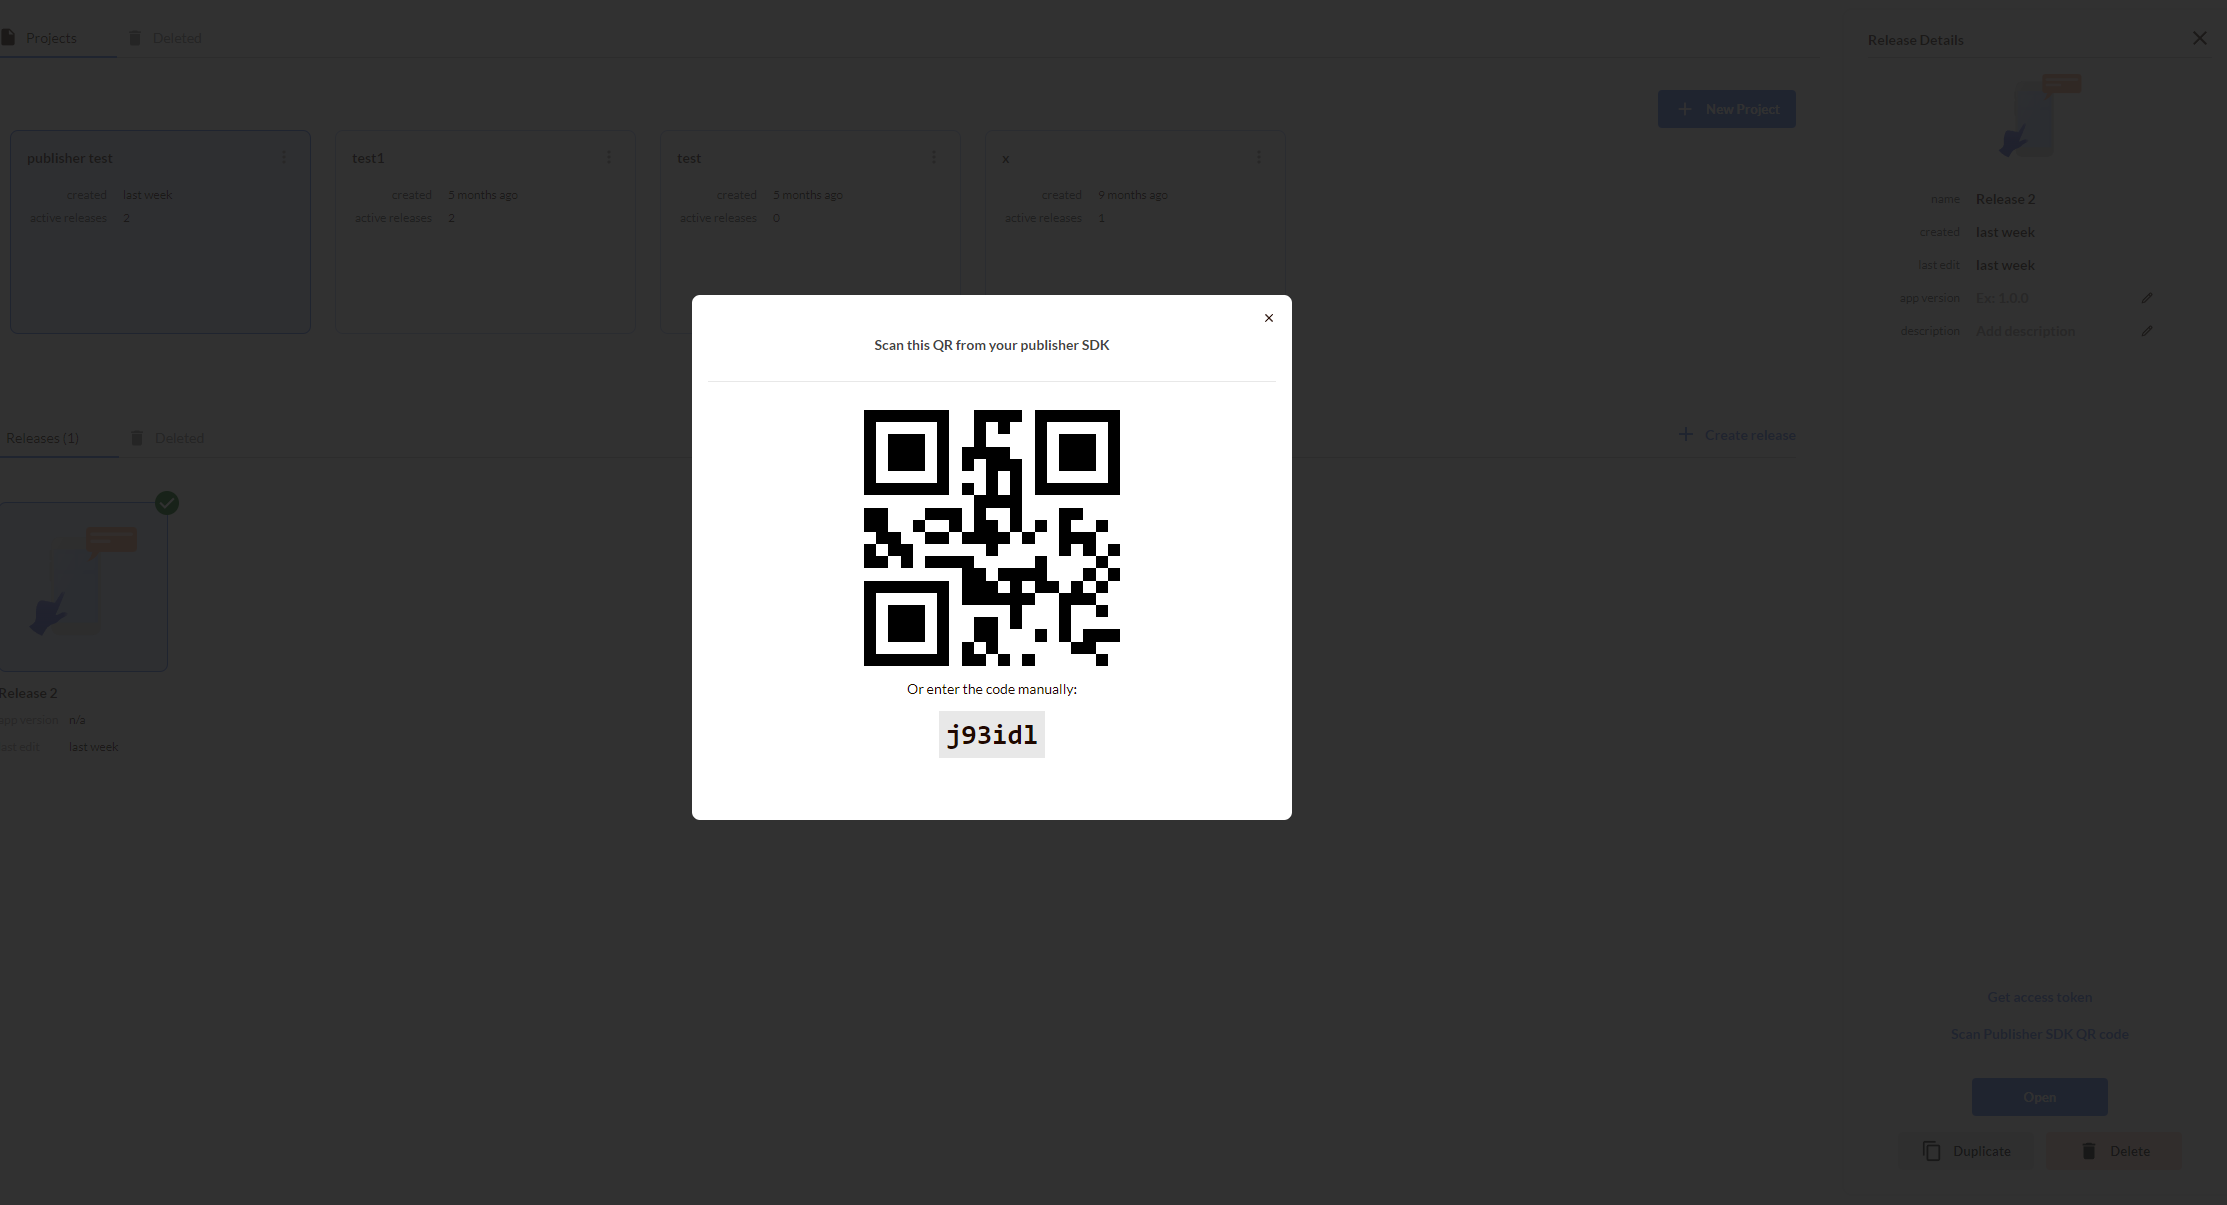
Once the QR code is generated on the CMS, you can choose to scan this code using your phone or alternatively enter the 6 letter alphanumeric displayed below the QR code.
Step 5
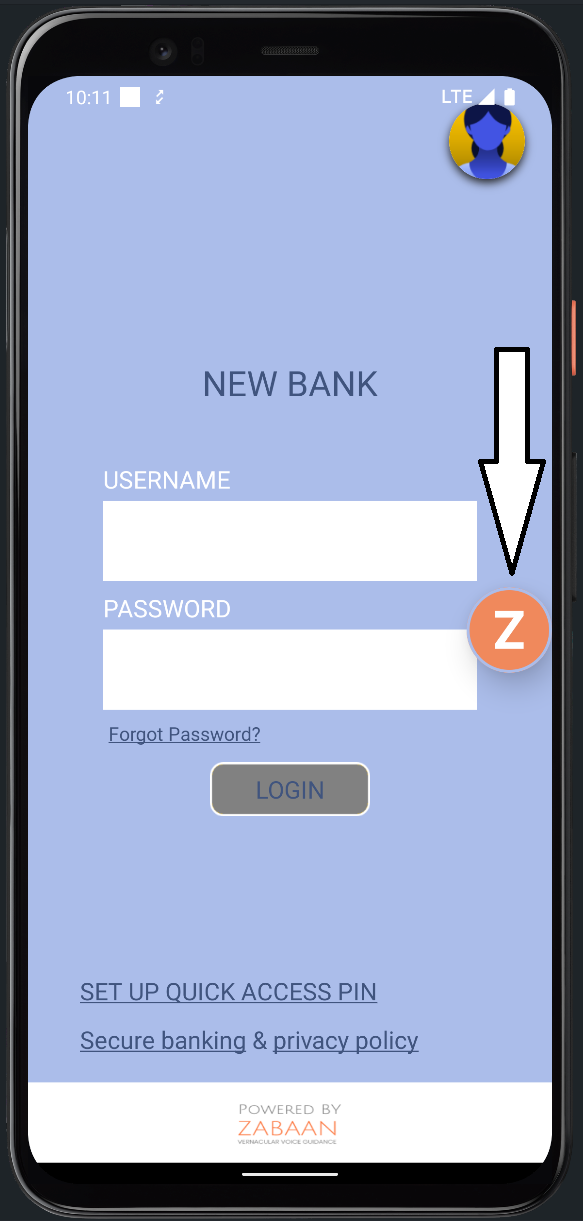
Upon completing the scan on your phone, you'll be redirected to your android application. You can now notice a floating bubble with the "Z" icon on your app screen. You can choose to disable the 'Z' bubble by dragging it to the bottom of the screen and re-enable it from the notifications tab.
Tap on the ‘Z’ bubble to take screenshots of the particular app screen you want to configure the Zabaan assistant for. These screenshots automatically get updated on the CMS, ready for annotation mapping.
Step 6
You can find these screenshots in the annotations section of the CMS. You can select the respective screenshot for each screen and state combination. You can add multiple screenshots in one session, in case you have a requirement to add screenshots later, you can repeat the same process from Step 1.
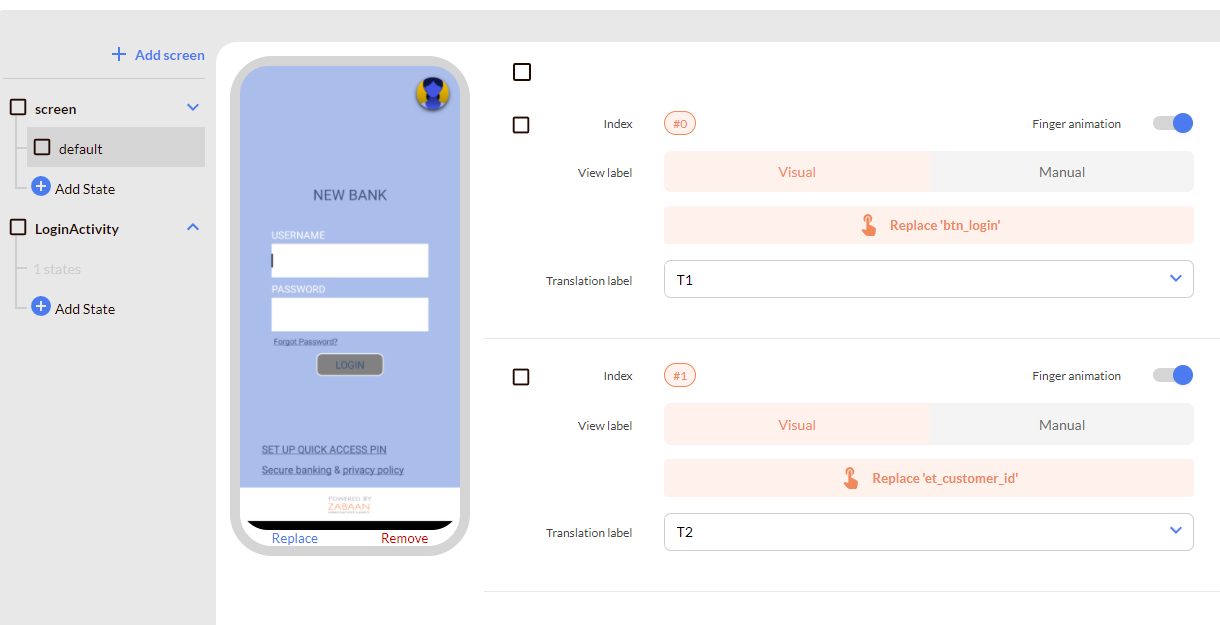
You can now utilise the visual reference of your screens to enable finger animations for specific elements on the selected screenshot thereby manage annotations on the CMS independently as a Product manager.